Choosing the right lettering style can completely change the mood of your DIY projects and commercial designs. When you need a relaxed, handwritten look that still reads clearly on merchandise, the Black Sample Font is a highly practical choice for creators. It offers a natural, flowing script that mimics real handwriting without sacrificing the legibility required for small business branding and print-on-demand products. Whether you are cutting vinyl decals or designing wedding invitations, having a reliable cursive typeface saves you hours of tweaking and ensures your final product looks professional.
What fonts look best next to handwritten styles?
Script fonts carry a lot of visual weight because of their loops, swashes, and varying stroke widths. To keep your designs balanced, always pair them with simple, clean typefaces. A basic sans-serif or a classic typewriter style works perfectly as a supporting text. For example, if your main heading uses a flowing cursive style, keep your subheadings and body text in a very plain, uniform font. This contrast ensures your message is easy to read from a distance, which is crucial for t-shirt designs, tote bags, and storefront signage.
If you want a slightly more playful vibe for your next project, you might also explore the Olivia Scatter style to see how different letterforms change the overall mood. Mixing and matching helps you find the perfect visual balance for your specific niche without overcrowding the design.
Which crafting projects actually work well with cursive text?
Not every project needs elaborate lettering, but certain items truly benefit from a personal, handwritten touch. Here are a few ways crafters and small business owners use these styles effectively in their daily work:
- Vinyl decals and mugs: Short, inspirational quotes or personalized names look great in cursive. The continuous flow of the letters makes them much easier to weed when cutting with a Cricut or Silhouette machine.
- Wedding and event stationery: Invitations, place cards, and menus feel much more intimate when the text looks like it was written by hand. For romantic themes, pairing your main text with something like the Little Love typeface can add a beautiful, delicate accent to the paper goods.
- Boutique packaging: Stamping a handwritten "thank you" or a custom brand logo on kraft paper bags and tissue paper gives your small business a premium, artisan feel that customers appreciate.
- Digital planners and journals: If your client prefers a more formal signature look for digital headers or branding, the Brittany Signature design offers an elegant alternative for professional layouts.
Why does my cursive text look messy when printed?
A common frustration for beginners is that beautiful lettering on a screen turns into an unreadable smudge once printed or cut. This usually happens because of improper spacing or scaling. Cursive letters are designed to connect, and stretching them too far apart breaks those connections, while squishing them together creates dark, heavy ink spots that ruin the delicate lines.
To fix this, avoid using the standard tracking or letter-spacing tools in your design software for connected scripts. Instead, scale the entire text block up or down as a single unit. If you need to adjust individual letters, convert the text to outlines first and manually move the shapes. When looking for similar styles, exploring the script fonts section can give you more ideas on how different typefaces handle letter connections and spacing.
Also, consider your physical material. For a more academic or journal-style aesthetic on textured paper, the Studying lettering provides a slightly more relaxed, informal appearance that hides minor printing imperfections and ink bleed very well.
How to prepare your files for cutting and printing
Before you send your design to the printer or hit "make" on your cutting machine, run through this quick preparation checklist to ensure a smooth production process:
- Convert to outlines: Always change your text to shapes or paths. This prevents missing font errors if you open the file on a different computer or send it to a professional print shop.
- Weld overlapping letters: If you are cutting vinyl, use the weld or unite tool in your software so the cutting blade treats the word as one continuous shape rather than cutting through the overlapping connections.
- Check the thinnest lines: Zoom in to 100% and look at the thinnest parts of the letters. If they are thinner than 1/16th of an inch, they might tear during weeding or fail to print clearly. Add a slight stroke to thicken them if necessary.
- Test print or cut: Always do a small test run on scrap material to check the actual physical size and legibility before committing to a full production batch.
Taking a few extra minutes to format your text properly will save you wasted materials and frustration, letting you focus on creating beautiful products your customers will love.
Download Now How to Choose a Stylish Font for Your Design Project
 You Are My Rainbow Font: Playful Design Ideas
 Creative Ways to Use the Brittany Signature Font
 Create Charming Invitations with Little Love Font
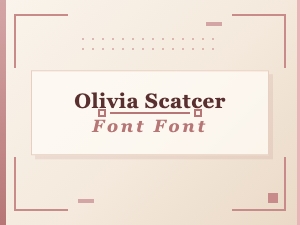 Olivia Scatter Font: Elevate Your Creative Projects
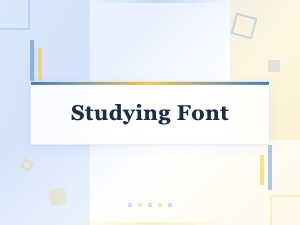 Studying Font Anatomy for Better Design Usability